Dave McLean Photography Blog

My photo
Welcome, My name is Dave McLean, I'm 40 years old, married with 2 children and live in the UK. I have been interested in photography for about 8 years now and hope to use this blog to share my pictures and anything photography related I come across.

Wednesday 30 June 2010

Nikon announces submission dates for international photo contest


Sent to you by mcleanfamily88 via Google Reader:


Nikon has announced its 33rd annual international digital photo competition will be open for entries from September 1, 2010. Participants can submit up to two images to either of the two categories - one with the theme 'Energy' and the other an un-themed, open category. The overall winner will be awarded the company's D3S digital SLR with two lenses, with category winners receiving a D300S with flashgun and lenses. The contest runs until November 30th 2010.


Things you can do from here:


Homemade Lenses: What's All The Fuzz About?


Sent to you by mcleanfamily88 via Google Reader:


Fireworks (by johnnyoptic)Several weeks ago, you may have read my post on this site entitled Build Your Own Lenses in which I extolled the wonders of homemade lenses and the soft, glowy images they produce.

In this post, I'm going to explain how to get that softness under control to produce images with interesting and more subtle soft focus effects, such as the photo on the left. (I'll even show you how homemade lenses can produce crisp, sharp images, if you like that sort of thing.)

read more


Things you can do from here:


Scott Bourne’s Fast Photo Tips – Week 5


Sent to you by mcleanfamily88 via Google Reader:


via Photofocus by scottbourne on 6/30/10

Copyright Scott Bourne 2008 - All Rights Reserved

Here's the fifth installment of my fast photo tips. These are simple posts filled with several short ideas to help improve your photography. Don't over-think it. Just try it.

Scott Bourne's Fast Photo Tip #13

If you shoot video on hybrid Canon Cameras those THM files that accompany your video files can be used to view the video file in Adobe Bridge and to see ALL camera metadata! Don't throw them away.

Scott Bourne's Fast Photo Tip #14

If you can press your face against your camera when you handhold it, you can stabilize it and reduce the chance of camera shake. The more points of contact, the more stable.

Scott Bourne's Fast Photo Tip #15

Pay attention to color in photographs. Color isn't just visual. It can cause people to feel physical differences like warmth, joy and peace. Color can BE the subject or tell the story or draw the eye or set the mood.

____
This post sponsored by WHCC – White House Custom Colour – Get Five Free 8×10 Prints From WHCC


Things you can do from here:


Travel Photography Subjects: Religion


Sent to you by mcleanfamily88 via Google Reader:


via Digital Photography School by Peter West Carey on 6/30/10

100304-183454-9742 This post is number four of twenty one subjects that will help you focus when on your next journey and wish to bring back a well rounded story of where you were.  If you're just going on vacation and only want pictures of yourself by the pool sipping boat drinks, then you can probably skip this one.  These posts are not intent on telling you everything you need to do, step by step, to capture perfect, cookie-cutter pictures while traveling.  Instead, they are intent on pointing out some vital elements to capture when on the road and ask thought provoking questions you may want to ask yourself.  My hope is they help guide you to find your own means to better expressing what your travels have meant to you and present that in the best light possible.

Now then, religion.  Like water, it will be everywhere you go.  Sometimes on the surface and pervasive to a culture.  Sometimes more subtle and maybe kept private.  As a  traveler, excited and open eyed, it may be easy to spot the religious influences in a distant land.  For one thing, if the religion is predominant to a particular area and it wasn't obvious back home, it'll be in your face.  The photo at right is Koutoubia Mosque in Marrakech, Morocco.  I grew up in the Pacific Northwest of the USA where Islam is not a high profile religion, so when I traveled to Morocco with its rich Islamic culture and mosques around every corner, it was fairly easy to spot its influence and importance to the culture.

But beyond the obvious, it takes some effort to go a little deeper, especially in areas with a large mix of religions.  Tucked into an unassuming section of the large souq in Fez, is a centuries old Jewish Synagogue.  Our guide goes on to tell us of the history of Jews in of Morocco, a slice of history for which I was totally oblivious until this trip.  After the visit to the Synagogue I started noticing more and more Jewish and Christian influences here and there.  Small, subtle and often tucked away, but they too had an influence in the architecture, language and customs in some form.

While discussing religion can certainly be a powder keg in different areas of the world (and some areas you'd never expect it to be a hot button, too!) my best advice, as with most things while traveling, is approach the subject with an open mind.  If what you're doing is trying to bring back a representation of the lands you are visiting, then you may need to bend outside your own view of home and try to see the home land through the eyes of those that live in this 'foreign' culture.  It's only foreign to you, others are living it every day.  It may be that the religious influences you find are close to your own and that familiarity will help.  But invariably there is something different about where you're traveling, for that is one of the main reasons for travel!

Exploring religion photographically takes a bit of courage because it will probably require you to step outside your comfort zone.  But the rewards are worth it.  Find out from a local (hotel clerk, taxi driver, bartender, food vendor, etc…) if you are allowed to visit a place of worship if the religion is different than your own (assuming you have a religion as not every one does).  Witnessing a worship service with your camera put away will help immerse you in the cultural differences.  Also ask those attending the ceremony or directing it, if you get a chance to meet them, if photographs are allowed.  Treat photography inside a place of worship with the same respect as if you were the guest in a house.

And don't forget to look for religion in the little things.  How does it influence the art, language and clothing where you are?  How is it practiced in the home, if you get a chance to visit a local home?  How does it influence the food and eating habits?  History and even city layouts?  On the opposite side, some areas you visit may have very few signs of religion which is an expression of the culture as well.

Religion need not be a point of contention when traveling.  Chances are, you'll find differences, large and small, to what you are accustom to back home.  Explore them with an open mind and lens to see learn more about the culture you're visiting.  And you'll return home with a well rounded story of where you've been.

By all means, please share your religious travel photographs in the comments section below.

Previous subjects in this series include Water, Old People and Young People.  Be sure to subscribe to the this site to receive the other 17 subjects to follow!

Post from: Digital Photography School - Photography Tips.

dpsbook.png

Travel Photography Subjects: Religion


Things you can do from here:


Chase Jarvis details his pro photography workflow


Sent to you by mcleanfamily88 via Google Reader:


via The Loop by Jim Dalrymple on 6/30/10

There's nothing better than getting information directly from the pros that we respect and follow. Whether it's music, graphics or in this case, photography, getting tips on workflow can be invaluable. Renowned photographer Chase Jarvis gives us tips on his workflow, storage and the proper way to backup the images you work so hard to [...]


Things you can do from here:


Tuesday 29 June 2010

Shoot in RAW – It’s What Ansel Adams Would Do

PhotoWalkPro

JPEG has it's place but if you really want to gain maximum tonal control over your images, you should be shooting with a RAW camera format. So what does this have to do with Ansel Adams, and how do I know he would be a RAW shooter? It's simple really. Way back in 1939 Ansel Adams came up with something called The Zone System. The object of the system was to produce proper exposure and processing to capture as much of the tonality of a scene as was present when the photographer took the picture. That's kind of a generalization of the system, especially since there are entire books to explain it. The general principle though was the assigning of luminance values to 11 different zones, with zone 0 being pure black and zone 10, pure white.

Zone System scale

Generally speaking, Ansel didn't care about these two zones because they held no information. It was his belief that the most important zones fell from zone 2, textured black, and zone 8, textured white. By concentrating on these zones, Adams was able to produce striking images with amazing tonal ranges.

How does this relate back to JPEGs? First off, they don't contain the dynamic range of a RAW file. Once the image is processed in the camera there is no hope of bringing back any values that are black or white. The information is clipped and no amount of post-processing will bring back any texture in them. A RAW file however contains luminance information that can be pulled back in from areas that might at first look like they are clipped through image processing. Let's take the image below for example.

This is the RAW image out of the camera with no processing applied. The camera meter tried it's best to balance the bright sky with the shaded canyon. There is some detail but because this is a RAW file I am able to bring back even more.  The mountains at the center of the image are almost completely blown out but by using the Recovery slider in Lightroom I can bring them back into view.

By using the Fill Light Slider, I can bring back the dark, underexposed areas of the canyon, once again because there is detail in the RAW file that is not readily visible.

Some final contrast tweaking and other slight adjustments renders an image that is much different than the initial exposure that came out of the camera.

Had my original image been a JPEG I could have adjusted the exposure to make changes to the tonality but I wouldn't not have been able to reveal any details that were lost to clipping in the darkest and lightest parts of the image.

If you would like to learn more about applying the Zone System to your photography, check out The Practical Zone System: For Film and Digital Photography by Chris Johnson. And remember, set your camera to capture in RAW, it's what Ansel would do.

Related posts:

  1. Why shoot RAW instead of JPEG
  2. Adams Morgan Neon
  3. What ever did they do before digital

Sent with Reeder


Dave Mclean
07515518447

How to Review & Clean-up Your Images Quickly and Effectively

*TWIP*

Post by Andrew Darlow – Follow Andrew on Twitter

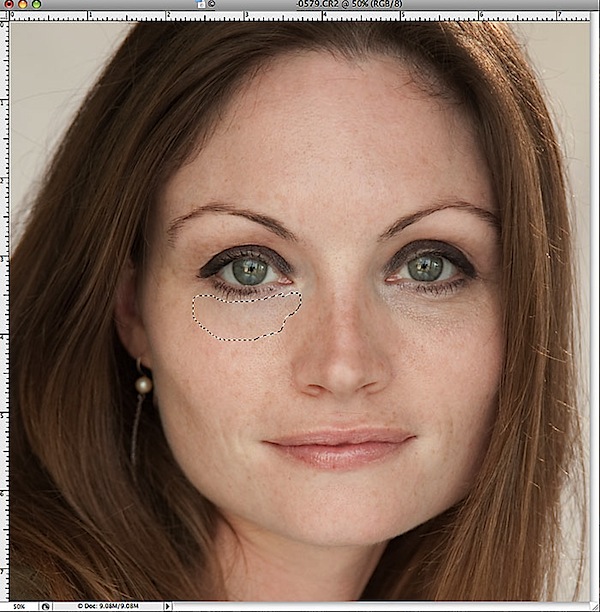
Above: An overview (left) and close-up section (right) of the same image showing a typical zoom level when reviewing and dusting images. The zoomed-in area is outlined in white.

If you've ever scanned your own prints, negatives, or slides (or had a lab scan them without fully dusting them for you), you've probably noticed some unwanted dust, scratches or other imperfections. Almost any scanned image will have unwanted "stuff" that needs to be removed. Digital cameras are generally far better in this regard, but they can suffer from similar problems, especially if you use a camera with interchangeable lenses and work in dusty environments. There are also many options for sensor cleaning, which can reduce dust dramatically. Many resources are available online to help you find the best solutions, but be careful if you decide to do your own sensor cleaning since you can do more harm than good. If you'd prefer to leave it to an expert, most of the larger companies who sell pro-level DSLRs also offer sensor cleaning services. Depending on location, that might require you to have to ship the camera, which can get costly, not to mention the fact that you'll be without the camera for at least a few days. That being said, as Scott Bourne explained in Photofocus Podcast Episode 41, an authorized service center will do more than just clean your sensor, so it will usually be money well spent.

Zooming In

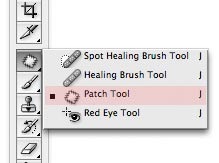
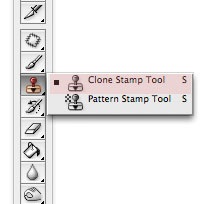
There are a number of ways to clean up scanned or digital camera files, including tools such as the Dust and Scratches filter and Healing Brush/Patch tools found in Adobe Photoshop and Photoshop Elements. Advancements in Apple Aperture and Adobe Photoshop Lightroom allow you to clean up virtually any file "nondestructively," which can save a lot of disk space compared with creating a Photoshop file with multiple layers (especially when working with RAW files). Another advantage is that same adjustment can be made to multiple files, which means that sensor dust that shows up in the same location can be fixed on hundreds or even thousands of images with just a few keystrokes. That being said, I find the flexibility and power of the clean-up tools in Photoshop to be superior than those in Aperture or Lightroom.

Regardless of which tools you use, you'll need to check your image effectively, which is the main focus of this article. I recommend you make this an integral part of your workflow for images you plan to present or print. You'll probably be surprised at how much time, paper and ink (or photo lab prints) you save. It's easy to miss a distracting dust spot on the screen, but when blown up to 20×30 inches, it will be staring right at you!

Below is a step-by-step approach for reviewing and cleaning up an image:

1. First fill the screen with your image, then zoom to 50, 66.7, 100, or 200 percent in your imaging application depending on the resolution of your file, how detailed the image is, and how large you plan to display or print the file. See the image above for a typical zoom-in amount (some images will need to be zoomed in more, especially if you are making very large prints or if you want people to be able to zoom in to see more detail). Note that 50, 100, and 200 percent are also known as 1:2, 1:1, and 2:1, respectively, in Lightroom and some other applications.

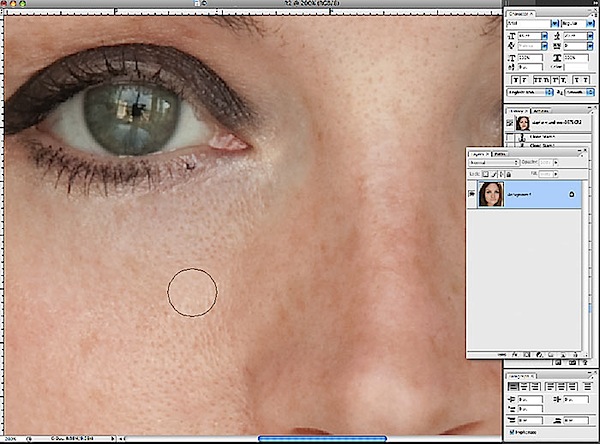
2. Starting at the top left, work from top to bottom, inspecting the whole section of the image that you see in that area. Using the space bar in Adobe Photoshop and Photoshop Elements, move down to the bottom as you clean up the file by holding down the space bar and clicking and dragging with your mouse or tablet and stylus (the space bar becomes the hand tool). When you reach the bottom, move the image to the left so that a new section is visible. Then continue moving up and cleaning the image until you reach the top. Then repeat this process until you're done. It becomes a Zen-like procedure once you get into it. While I'm on the topic, I also recommend learning the shortcut keys for zooming in and out in whichever application you use. In Photoshop, there are a few shortcuts, but the one I like to use to zoom in is Cmd+Space bar+Click on Image (Mac) or Ctrl+Space bar+Click on Image (Windows), and the shortcut to zoom out is Option+Space bar+Click on Image (Mac) or Alt+Space bar+Click on Image (Windows).

3. Take one more quick look at the entire image (usually at 100% or 1:1). It's easy to miss something, so by taking another look, you can help ensure that the image is good to go.

I should note that even though I'm specifically covering the clean-up of unwanted dust and similar imperfections in this article, the techniques described above can be used to do any retouching more effectively, such as removing or reducing skin blemishes or unwanted objects in photos.

scancafewide


Sent with Reeder


Dave Mclean
07515518447

The Top 11 Things Photographers Wish They Learned in Photo School


Sent to you by mcleanfamily88 via Google Reader:


via A Picture's Worth | PhotoShelter by Grover Sanschagrin on 6/29/10

by Grover Sanschagrin

note-to-self-3.jpg


We've all learned a lesson "the hard way." We all wish we paid more attention in school. We all think that life would have been easier if someone just taught us that one really important lesson.

I decided to ask a few of photographers what they wished they learned earlier in their career. I asked them to think of an experience that happened in their life that would have been better if they had learned something earlier.

My trusted panel of photographers have all achieved success in the photography industry:


Joe McNally
, freelance photographer
Ami Vitale, freelance photographer
Brian Peterson, staff photographer, Minneapolis Star Tribune
Casey Templeton, freelance photographer
Shannon Fagan, freelance commercial photographer
Michael Schwarz, freelance photographer
Scott Strazzante, staff photographer, Chicago Tribune
Andy Biggs, freelance photographer
Robert Seale, freelance photographer
Tim Mantoani, freelance photographer
Corey Rich, freelance photographer


Then, I asked the same question on Twitter and got responses from, well, whoever responded. Their answers are posted here as well.


Things you can do from here:


Noiseware – A Noise Reduction Tool Without Equal


Sent to you by mcleanfamily88 via Google Reader:


via John Paul Caponigro Blog by johnpaulcaponigro on 6/29/10

noiseware

Who doesn't have noise? If you don't run into noise in your digital images, at least once in a while, you may not be pushing the envelope enough. You can photograph long after dark; if you haven't tried it, you owe it to yourself to experience this—it's magical. And if you find you don't have a DSLR on hand, this should be no reason not to make pictures with a point-and-shoot or cell phone.

Whether you're using a cell phone, a point-and-shoot digital camera or a DSLR at high ISOs or with very long exposures, you're bound to run into some noise. Noise happens. When you have it, there's a lot you can do about it. There are many ways you can reduce noise during postprocessing; you could even say there's an art to it. Learning these techniques can improve good exposures and save others.

If Lightroom and Photoshop fail to adequately reduce noise in your images, it's time to move to third-party plug-ins. For years, they've done a superior job of reducing noise, and they still do. While there are many fine third-party plug-ins for Photoshop (Noise Ninja, Neat Image, Dfine, etc.), one stands out from all the rest: Imagenomic's Noiseware Professional.

For me, Noiseware is the most robust noise-reduction software available. Ironically, while it offers the most sophisticated feature set, very often the default settings when you first open an image are all you're likely to need. In many cases, very little, if any, additional tweaking is necessary …

Read more at Digital PhotoPro.

Find Noiseware here.

Learn more in my workshops.


Things you can do from here:


The Fast Way to Remove Dark Circles Under Eyes in Photoshop


Sent to you by mcleanfamily88 via Google Reader:


via Digital Photography School by Guest Contributor on 6/29/10

A Guest post by Phil Steele

Almost any portrait subject over the age of 25 can use some under-eye cleanup, but many photographers struggle to make this common retouch look natural. I know I struggled with it, until I found this handy shortcut.

Most of us start out using the Clone Stamp tool as our all-purpose retouching sledgehammer. It's great for removing blemishes, so we just keep going and going and try to fix everything with it. But using the Clone Stamp tool to retouch bags or dark circles under eyes can require patience and artistic skill that many of us lack.

Not to worry. There's an easy "instant fix" solution.

1. Open the photo that you need to retouch in Photoshop.

2. Select the Patch Tool, which lives on the same Toolbar square as the Healing Brush. You can right-click on that square to select the Patch Tool from the fly-out menu.   

steele_patch_tool.jpg

3. Using the patch tool, draw a closed loop around the area under the eye that you want to retouch. Be careful not to chop off the eyelashes.

steele_draw_patch.jpg

4. Now that the loop is selected and surrounded by a dashed line, click inside it, and with the mouse button held down, drag that loop down onto the cheek of your subject. Drag it to an area of smooth, clean skin with good texture. This will be your sample area.

steele_drag_patch.jpg

5. After dragging to a clean sample area, release the mouse button. Bang! Instantly the texture of the sampled area will be remapped onto the target area under the eye, smoothing out any bags and correcting the color of dark circles!

steele_release_patch.jpg

Somehow the wizards at Photoshop have programmed this thing to blend the texture of the sample area and the color of the target area in a way that looks totally natural (most of the time). Occasionally, you'll find a face where it doesn't work so well, but 90% of the time, this fix is all I need.

6. Deselect it by pressing Command-D (PC: Control-D) and check the results.

7. If there is a visible edge along the border of the patch, you can zoom in and do a little cleanup. Now is the time for the Clone Stamp tool. Adjust the opacity to about 30%, take a sample (Alt:Click) from clean skin near the edge of the patch, and than lightly clone along the borderline to smooth away any visible edge.

steele_clone_tool.jpg

steele_clone_cursor.jpg

With practice, you'll get skilled at drawing and sampling with the Patch tool so that edge touch-up is rarely necessary.

Then you'll enjoy this as a fast, easy, one-step solution to most of your under-eye portrait problems!

philsteele.jpgAbout the Author : Phil Steele is the founder of SteeleTraining.com where you'll find free photo tutorials and training on a variety of topics ranging from basic photography tips to advanced off-camera flash techniques.

The photo used in this tutorial came from his popular course, "How to Shoot Professional-Looking Headshots and Portraits on a Budget with Small Flashes."

Post from: Digital Photography School - Photography Tips.

dpsbook.png

The Fast Way to Remove Dark Circles Under Eyes in Photoshop


Things you can do from here: