15 Must Have Photography Accessories Under $25*: "
<  p>A Guest post by Kat Landreth from Pare and Focus. *All prices and estimates in USD.
Photography can be an expensive hobby. Cameras cost a bundle and lenses for DSLRs often cost a lot more than the camera body. Once you come to grips with the money you spent on the bare necessities it can be daunting to think about spending another fortune on accessories.
The good news is there are plenty of photography accessories that costs less than $25 (US). I’ve put together 15 of my favorites, and they often cost a lot less than $25. But I don’t think of them as “cheap” or “budget” items. These are valuable tools I would want in my kit even if money was no object. The combination of value and low cost means they make great gifts too.
1. White Foam Core - At around $5 this is probably the least expensive lighting equipment you’ll ever own. The white surface can be used to bounce light into shadows, softening hard contrasty light. Or, place it between your subject and the light source to cast shadows where you want them. You can even place it behind your subject for a clean distraction free background. Buy just one from a craft store for a few dollars, or get a pack of 5 boards on amazon.com for about $15.
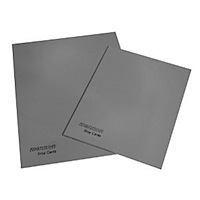 2. 18% Gray Card (AKA Medium Gray Card – Use your post processing time to get creative, not fixing basic exposure and white balance problems. A medium gray card helps you get it right “in camera” for just $10. An 18% gray card is designed to represent the average photographic scene by reflecting an average amount of light (18% give or take). Cameras are designed to reproduce average scenes, but not every scene in real life is average. Your camera can be fooled into under or over exposing pictures of very bright or very dark scenes. Using a gray card to set exposure will give you much more accurate results. You can also use an medium gray card to set a custom white balance for more consistent color in your photos.
3. Spray Bottle - The trick to shooting fresh and dewy spider webs, fruit, and flowers isn’t waking at the crack of dawn. It’s having a spray bottle handy. It might feel like “cheating” at first but when you see the results you won’t care anymore. You can’t argue with the price either. Fine mist spray bottles can be found for about one dollar.
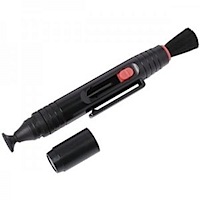 4. Lens Pen - Leave the lens fluid and papers at home. The “pen” has a microfiber disk filled with dry lens cleaner on one end. The other end has a retractable brush. Dusting with the brush removes large particles of dust. Lightly rubbing the disk on your lens will remove smudges, fingerprints and spots. A half twist of the pen with the cap on cleans the disk. I swear by this thing. I bought one for a trip to dusty Africa and used it extensively. They’re easy to use, they work perfectly, and they’re pretty cheap (around $10). I can’t believe I didn’t have one before.
5. Cloth bag of rice/beans - If you can’t or don’t want to carry a tripod around, having a bag of rice can be the next best thing. Use it to prop up your camera or rest your lens anywhere. Keep the cloth bag empty when traveling to save space and weight. When you get to your destination buy some rice or beans and fill it up. When you’re done, either eat the rice/beans, or give them to someone in need. You can buy dedicated “beanbags” filled with plastic pellets for exactly this purpose starting at about $8.
6. Remote Shutter Release - Make tack sharp photos and no fuss self portraits for around $20. A remote shutter release lets you take the picture without touching the camera. This reduces motion blur caused by camera shake. Since the cord is a couple of feet long, it can make taking self portraits a little easier too. If you spend some time on Amazon you may even find a wireless remote shutter release that gives you even greater flexibility in the same price range. The camera’s self-timer is a less flexible but free option.
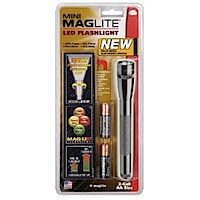 7. LED Flash Light - These things are multi tasking marvels. Experiment with light drawing and light painting at night. And while you’re out there in the dark, you can use it to see where you’re going. They’re not just for night photography though. LED lights can look pretty close to sunlight. If you’re shooting outside they can be an inexpensive stand in for an off camera flash. You can get a small LED Maglite for around $20.
8. Nikon (or similar) Lens Caps - I love my Canon, but they make the worst lens caps. Nikon caps are a lot easier to use. The pinchable area on the sides of the Nikon cap are at least twice as wide as the Canon caps. You can pinch from the center of a Nikon cap as well. This makes it easier to remove/replace the cap when a lens hood is in place. The easier it is to use the more likely I am to use it. The more I use the cap, the safer my lens is. They come in a variety of sizes (make sure you get the right size for your lens) and generally cost a few dollars.
 9. A Flash Diffuser (or Wax Paper) - If you have to use the on-camera flash, you can at least soften its effects with a flash diffuser. These come in many styles but they all use a white translucent material to diffuse light. Want to try before you buy? Tape a ring of waxed paper around your pop up flash next time you use it. In principal this will do the same thing as a diffuser, though it’s not durable and certainly not professional looking. When you’re at home taking family snapshots it probably doesn’t matter if you look professional. But, fair warning, it might not be a good idea to let the bride catch you with wax paper on your camera at your next wedding gig.
10. Filter Wrench - If you have any screw on filters, one day, one of them will get stuck on your lens. It’s a sad but true fact of filter use. Filters often get stuck because the pressure from your fingers bends the filter a little when you try to unscrew them. Gripping harder to un-stick a stuck-on filter just makes it worse. A filter wrench distributes the pressure of your grip around the entire edge, gripping the filter tight without bending it. Get a filter wrench before you need one so you’re not tempted to force off a stuck-on filter and make it permanently stuck in the process. A set of two wrenches costs about $5.
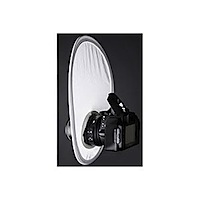
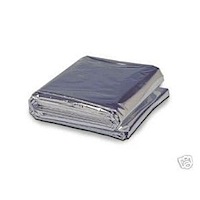 11. Reflective Emergency Blanket and/or Circular Reflector - Both of these can be used to reflect light into shadows. The nice thing about the emergency blanket, aside from it being very cheap (a pack of four blankets costs a little over $5), is that the mylar it’s made of is waterproof. Throw it over your gear in a sudden downpour, or toss it on the dewey ground when you need to get low. Circular reflectors can’t pull triple duty like the emergency blanket, but they can still be had for under $25 and unlike the emergency blanket they can be held in place with one hand. Ideally, you would have both and at these prices that’s actually practical.
12. Bulb Blower - It’s important to blow off any large grains of sand and dirt before you wipe your camera or lens. You don’t want grains of sand to scratch your lens as you wipe it. A bulb blower delivers a powerful blast of clean air to blow away any dangerous particles. Skip the wimpy brush/blower combo they try to sell you in cleaning kits. The only thing they really do is shed bristled on your camera. Giottos makes a great bulb blower called the Rocket Blower for about $10.
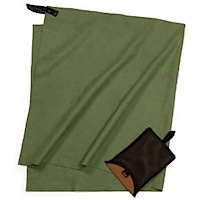
13. Compact Backpacking Hand Towel - This is a must have if you shoot outside. An absorbent lightweight backpacking towel can whisk drops of water away before they become a problem. It’s also nice just to give your gear a quick wipe down at the end of the day to prevent dust and grime from accumulating. Keeping dust and dirt off the outside of your camera may even help keep it from getting inside your camera when you change lenses. These towels take up very little room and they’re worth every penny of the $10 they cost. *Note: I don’t use this for the front or rear element of the lens.
14. A Flickr Account - Use for archiving, getting feedback, showing off, and tracking your progress. A free account gets you 100MB of photo storage every calender month. For about $25 a year you get unlimited uploads and storage space which is awesome if you want to archive your digital photos. I really like Flickr for the community (which you get access to wether you go pro or not). Photographers start “groups” to share photos and discussions with other, like minded photogs.
Wether you want to ask questions, start a group or just have an online home for your photos Flickr’s got you covered.
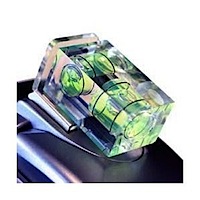 15. Hot Shoe Mount Bubble Level- Keep your horizons straight even when hand-holding. It’s just a small bubble level that slips into your camera’s hot shoe. Not having to constantly straighten and crop your photos could easily be worth the $5 this bubble level costs.
These make great gifts! Is there a budding photographer in your life? A gift basket stuffed with a lens pen, compact hand towel, and bulb blower is perfect for a traveler. Are they shooting family events and holidays? Lighting accessories like reflectors, diffusors, and white foam core really come in handy for portraiture. Just bought their first DSLR? A basket with an 18% gray card, filter wrench, and remote shutter release is better than any cheap “get started kit” sold at the camera store.
I’m always looking for ways to do more with less. So, what are your favorite inexpensive photography accessories?
About the Author: Kat Landreth runs a blog called Pare and Focus – it has simple, inexpensive tips to make digital photos look better. There are “in camera” tricks along side tutorials for the free image editor GIMP.
Post from: Digital Photography School - Photography Tips.

15 Must Have Photography Accessories Under $25*

"

 Quite a few people asked me about the small boom that was used for the key light in the photos of J.D. Roth.
 One caveat: I do not recommend balancing this thing on top of a compact, 5-way stand. While I love them for speedlights, this would be asking too much of the stand. (The boom is sturdy, the compact stand combo is not.)
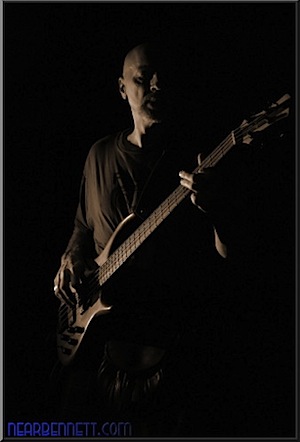
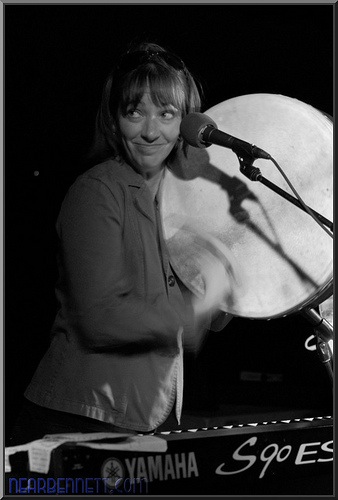
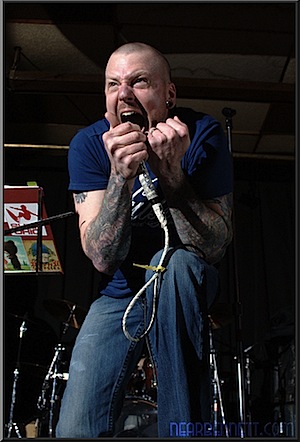 Band photography in bars can be very challenging, but with a little bit of knowledge and planning you can make images that blow away the standard fan photo. In Part 1,
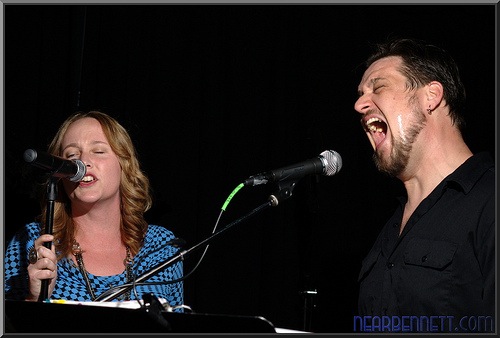


 "
"