Dave McLean Photography Blog

My photo
Welcome, My name is Dave McLean, I'm 40 years old, married with 2 children and live in the UK. I have been interested in photography for about 8 years now and hope to use this blog to share my pictures and anything photography related I come across.

Thursday, 16 September 2010

Eight Fast Tips for Better Glamour Photographs

Eight Fast Tips for Better Glamour Photographs: "

Copyright Joe Farace


Guest Post & Photo by Joe Farace – Follow Joe on Twitter


Many photographers are intrigued at the prospect of creating glamour photographs but may feel that a lack of “proper” equipment makes this goal unattainable. Nothing is farther from the truth. My No Frills approach to glamour photography doesn’t require a studio and, as Wilford Brimley might have said, “You don’t even need any fancy studio lighting equipment.” All that’s really necessary to produce professional quality glamour images is a camera with interchangeable lenses, a few simple photographic accessories, such as reflector and speedlight, and models that are willing to pose for you.


Here’s a few simple tips that will help make your first glamour photographs a little bit better.


1. Avoid flashy jewelry. Make your model’s face, especially her eyes, the focus of the photograph.

2. Have her wear solid colors. Nothing detracts more than clothes covered with busy patterns and prints.

3. Clothing fit. If a model’s clothes don’t fit, use wooden clothespins (out of camera range) to snug them up. And this happens more than you might think.

4. Hairstyles. Ask the model to style their hair differently for each change of clothing to add variety to the session and the photos that she can have in her portfolio.

5. Expression. Some models look great with a smile, others look better without one. Shoot a few test shots each way and make a determination what looks best for her. It will be obvious, right there on your camera’s LCD screen.

6. Make-up. When changing hairstyles or outfits, ask the model to changes her makeup style and color too. It doesn’t have to be drastic, maybe a different lipstick color or darker eye shadow. Red lipstick rocks. Ask her to try it.

7. Footwear. For a more a statuesque posture, ask the model to wear her highest heels. No high heels? Ask her to stand on her toes for s few shots.

8. Relax. A glamour shoot is a team effort. Model and photographer must work together to achieve the best possible images.


Joe is the author of a new book called Joe Farace’s Glamour Photography: The Digital Photographer’s Guide to Getting Great Results with Minimal Equipment


___

This post sponsored by X-Rite Color and the ColorChecker Passport


"

Two Things I Tell Every Bride

Two Things I Tell Every Bride: "

Weddings are such delicate piece of work. They can’t be done flippantly or without preparation. And with such easy access to high performance pieces of equipment, it is so easy for just any Joe Schmo to buy a DSLR and some business cards. This practice means that us professionals need to be completely on the ball in business and sell ourselves and our services appropriately. Yes, Joe will give you a whole day of shooting and the disk for £300. But he will also give you a lot more than you bargained for if you were actually expecting professional grade results.


I had a message from a friend/client recently who shared her disappointment with her wedding photos. She said, “I ended up with only 3 or 4 good shots from the whole day!! Still have photos in my album with red eye, ones completely in shadow and even though I asked for non traditional photos still have pages of eveyone looking centre and bored, the whole thing just totally unispiring!!!!! It is my own fault really for not knowing what to look for.” When I asked if she’d even seen his work prior to hiring him, she replied, “I saw a few things that he had done, he had a phtography room in his house (wait, he didn’t go to her? Jerk.) with framed pictures on the wall, obviously some of his better shots!! He was just in the process of setting up a new website so had limited access to previous wedding photos (yeeeeah ok. Buh bye!)” I really feel for this girl. Most of our clients aren’t going to be photography minded. They know they need a photographer at their wedding (the first step in the right direction) but after that, they don’t really know what to look for. I imagine wedding magazines give them tips for this important decision.


There are a couple key points from what she said that we can learn from:


1. “…even though I asked him for non traditional photos”


This is where we can see that our clients need our help. It is our responsibility to show them, tell them and then show them again our style. You can’t ask a point-and-shoot photographer to take ‘non traditional’ photos. And as she told me, she should have known better what to look for. But you won’t have a happy client if what they want is non traditional and your style is traditional. You know, you can turn down jobs. I’ve said before that “I don’t think I’m the right photographer for you”. In your pre-booking first meeting, show them your style and make sure it’s clear. My contract says that if a photo is in B&W, that is my judgment call and that it is commonplace for wedding photos to be primarily in B&W to preserve the emotions and the timeless, classic beauty of this act of love. I used to say that I refused to edit in selective colour. I still hate it but many couples want it. So I provide it but I don’t post them online or show them to potential clients.


2. “…obviously some of his better shots!”


Hold it RIGHT THERE! Did you just speed over that phrase? She’s saying exactly what WE should be saying. That those 5-10 perfect moments we post on our blog the day after a wedding and the photos we share in our first meeting with a bride are our best work. I learned very quickly that my brides were expecting that level of perfection for every single photograph. Some were expecting me to do total magic and turn their fluorescent-lit, 1970’s carpeted town hall wedding into some sort of visual masterpiece. I don’t accept work if the venue is a shambles, by the way. Another perfectly good reason to turn down a wedding. Share with them the things about the album they’re looking at that made those photos some of your best. Tell them that the couple required no coaxing, pleading and begging to just ‘act natural’. Tell them that the location was carefully planned to take the photography into consideration. Tell them that the couple took your advice and didn’t place the head table smack in front of a gigantic window (also in my contract). Explain that you will also provide them with ‘regular’ pictures to record their day, their guests, their carefully planned details. But that perfect shot of the rings that took 10 minutes to style (it’s not easy hanging a diamond off a dew drop!) and then another 5 minutes to photograph will not be the norm for every one of their resulting 500 images.


As photographers, we absolutely must communicate every last detail of our services to our client and have a very detailed, specific contract to fall back on if they don’t make room for you in the wedding car and then complain that there are no photos of them in the wedding car. It is their right to know everything your brand is about and your responsibility to communicate that to them. Trust me. After all, I’m that learned-everything-the-hard-way photographer.


Post from: Digital Photography School


"

Wednesday, 15 September 2010

Embracing the Weather with Photography: Part 2

Embracing the Weather with Photography: Part 2: "

Previously we discussed how sunny, rainy, snowy and overcast weather can affect your scene, now we will look at how other forms can help and hinder your photography…


Cloudy Skies


Image by MorBCN


Many photographers are often thankfully for bright but cloudy skies, as that thin veil of cloud can diffuse the sun’s rays producing a perfect delicate and soft light – much like a softbox does. However on a windy day clouds can be blown across the sky in minutes and your perfect light could be gone as quickly as it arrived so you’ll be forced to work quickly and if you have limited patience you may be forced to restrict yourself to grabbing safety shots before getting creative.


For the landscape enthusiast this can often lend itself to the genre; for example a valley sewn together with patchwork-like fields can look radiant with dappled sunshine and spotted a few darkened cloud shapes. To get the most out of this scene, meter for the whole frame to gain the average exposure or bracket exposures to compile together later. Some models now offer an in-camera HDR setting – if you are confident in its abilities perhaps try it here.


To capture nothing but the clouds, such as a fierce storm cloud before it breaks; set your camera upon a tripod, select a narrow aperture, zoom in as close as possible and meter across the scene due to the varying exposure levels within the frame – as such a circular polariser may be of benefit here too.


Frost
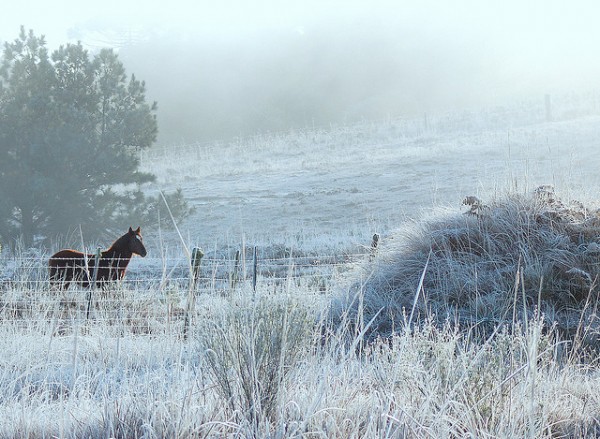

Image by Eduardo Amorim


Shooting in the early hours can often produce the best photography thanks to that soft, warm and subtle light and if the ground is sprinkled with a fine layer of frost, the colours of the earth can appear luminous as the ice shines against the shine’s glare. Find a location where the ground shows through and a variety in colours will also add interest. The potential for delicate frost-covered macro shots is vast, so pack a waterproof blanket and get as close to nature as you dare. Use a wide aperture and employ a polarizer should you want to saturate colours.


Lightening Storms


That elusive and fleeting electrical bolt can drive even the most patient of photographers crazy. To maximise your chances of a decent capture set your camera on a tripod and turn off the lens’ vibration reduction option. If are shooting with a compact switch it into fireworks mode and keep as still as possible or balance the device on something solid.
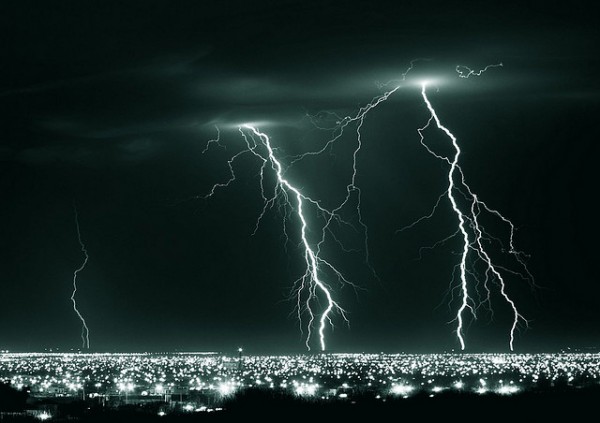

Image by Brujo+


Finding a good shooting spot is half the battle. Shooting in urban environments such as towns and cities are counter-productive as the light pollution can detract from the ambience of the storm, so if possible travel outside of the urban district and away from abundant light sources to a place where the skies appear darker.


When using a DSLR set the camera into Manual and ISO 100. A wide angle lens will give you a better chance of catching the fork as it falls and this offers you the potential to later crop in for effect. Alternatively zoom in with a telephoto for extra drama and the ability to play with perspective. In either case it is ideal to compose the scene to include foreground interest.


Ideally an aperture of around f8 will yield strong results but will depend on what else you want to capture within your scene. Keep the shutter open using the bulb exposure for a shutter speed of around 15 to 30 seconds (or even more in some cases) and release the button when the fork hits. Due to the sporadic nature of lighting you will find you have to repeat this process several times to get a decent shot and for well defined images it is recommended that you incorporate a remote to release the shutter or a self timer (although this will take extra patience).


Fog


Don’t think of fog as dull, think of it as enchanting and like most weather, fog looks best at first light. A tripod is essential and lengthy exposures will work best here with a polarising filter helping to control exposure.
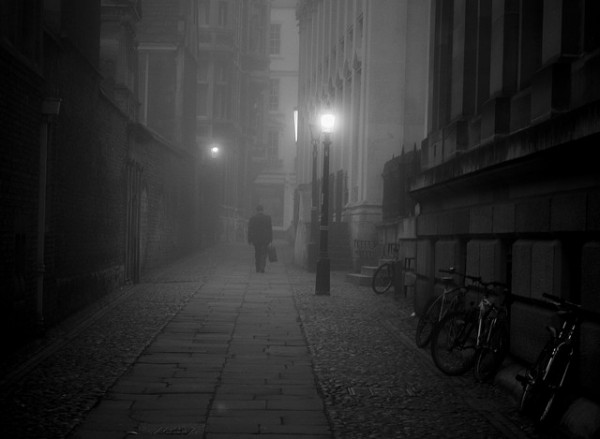

Image by monkeyleader


Foggy scenes are generally low-contrast events and as such colours are muted – two things you can later tweak in the editing suite if required. However, this lack of immediate interest combined with a void backdrop will mean you will need to compensate in other ways to engage the viewer – i.e. intriguing foreground interest, so consider the composition wisely.


Wind


A strong gust of wind is often the common culprit for shaky landscape captures, so take a plastic bag along with you to the location and fill it with rocks and stones along the way. Hang this bag on the hook underneath the base of the tripod to ground it; alternatively you can use your camera bag backpack.
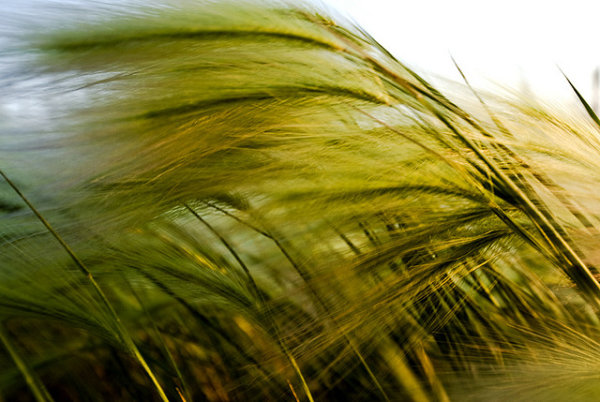

Image by dawn m. armfield


Once in position and a stable position too, consider using a lengthy exposure to capture the movement of clouds across the sky. Again a polariser or ND Grad filter could help you here.


Post from: Digital Photography School


"

Friday, 10 September 2010

10 quick wildlife photography tips

10 quick wildlife photography tips: "

Improve your photos with our expert help. Here are 10 quick wildlife photography tips to help you get your animal and bird photography off to a flying start…

Whether you're new to digital photography or just searching for some inspiration, our quick and easy photography tips will help you take better pictures with the minimum of fuss.

10 quick wildlife photography tips

read more…


"

10 quick landscape photography tips

10 quick landscape photography tips: "

Improve your photos with our expert help. Here are 10 quick landscape photography tips to help you give your pictures a breath of fresh air…

Whether you're new to digital photography or just searching for some inspiration, our quick and easy photography tips will help you take better pictures with the minimum of fuss.

10 quick landscape photography tips

read more…


"

Saturday, 4 September 2010

A DIY Clip Gel Holder

A DIY Clip Gel Holder: "

A DIY Clip Gel HolderWe have featured some awsome gel holders on the site before. But never one with this simple approach. It is fast to mount, easy to use and leave no residue on the strobe.


It also fits any size flash and any size gel, how cool is that?


Thanks, Jerry R Hamby, for this awsome build.


read more


"